
Important: Before You Start
Please take a moment to read through these before you start using Design Upgrade Pro for LearnDash. They contain some important information in order for the plugin to work properly, as well as some tips to make customizing your LearnDash design a little easier.
REMINDER
These options only apply to the pro version. If you have the free version, there are no settings to customize. You simply install the plugin & that’s it.
Reset LearnDash Color Settings
In order for our plugin’s color options to work, you’ll need to disable any LearnDash color settings you have previously set. If you have not chosen any custom colors in this area, you can disregard this step. But if you have set up custom colors…
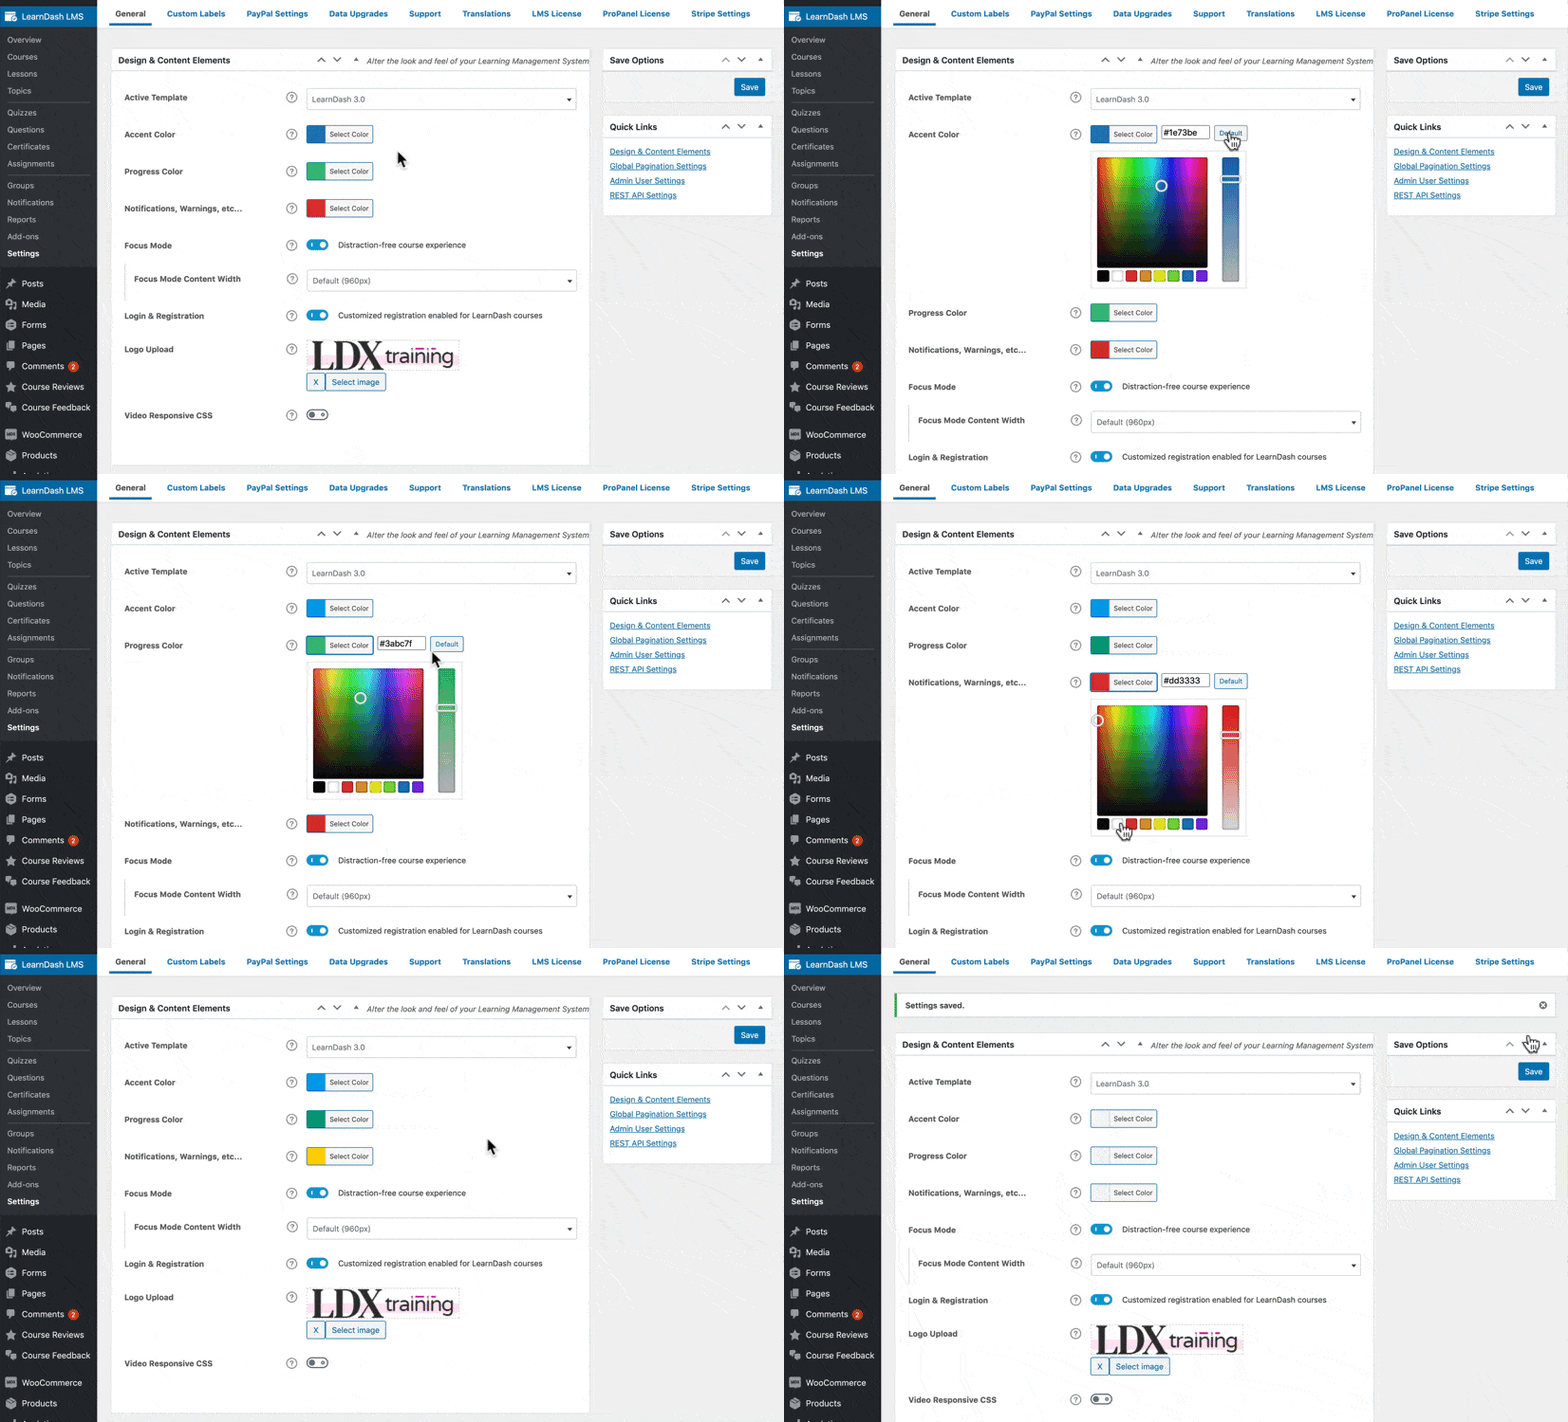
- Navigate to LearnDash LMS > Settings
- In the Design & Content Elements section, you’ll see 3 color options
- Click on the Select Color button, and then click Default
- Once you’ve done this for all 3 colors, click the Save button in the top-right corner
LearnDash 4.15 and Higher
If you’re using LearnDash 4.15 or higher, you’ll notice LearnDash has added their own styling options to the Customizer. They can be found under LearnDash Styles. In most cases, our plugin will override these settings, however, if you notice any of our settings not working, check to see if you have set a color in the LearnDash Styles panel.
If you have, clear it out by clicking Select Color, then click the Default button, and then click Publish at the top. This will remove the LearnDash color and you’ll then likely notice that our color option is working again.
3 Ways to Access Customizer Options
All of Design Upgrade Pro’s options are located in the WordPress Customizer. Let’s walk through the 3 main ways you can access them.
PRO TIP
To preview your customizations before making them live, you’ll need to visit the appropriate LearnDash-related page in the Customizer. This is why option #3 is often the preferred method.
1. From the Installed Plugins page
After you’ve activated the plugin, you might find yourself back on the Plugins > Installed Plugins page. If you’d like to navigate directly to the options panel in the Customizer, you can click on the “Customize” link below the plugin name.
This will take you directly to the LearnDash Design Upgrade panel in the Customizer, which contains all the sub-panels where our options are located.

2. Appearance > Customize
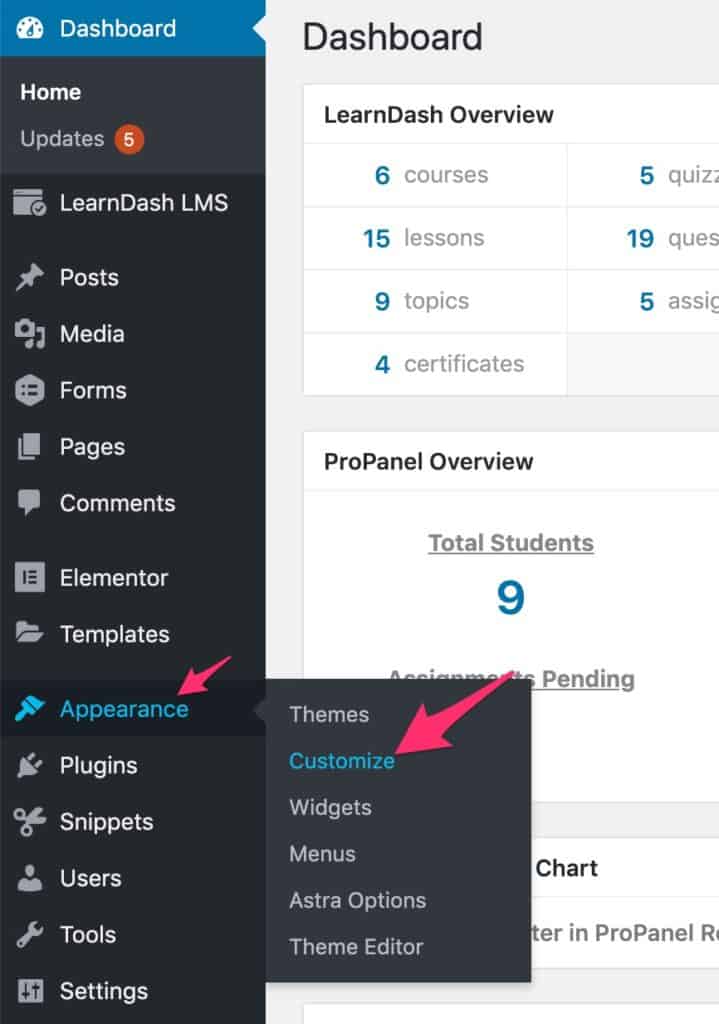
No matter where you are in the WordPress admin area, you’ll always have a link in the left sidebar that will take you to the Customizer.
- Navigate to Appearance > Customize
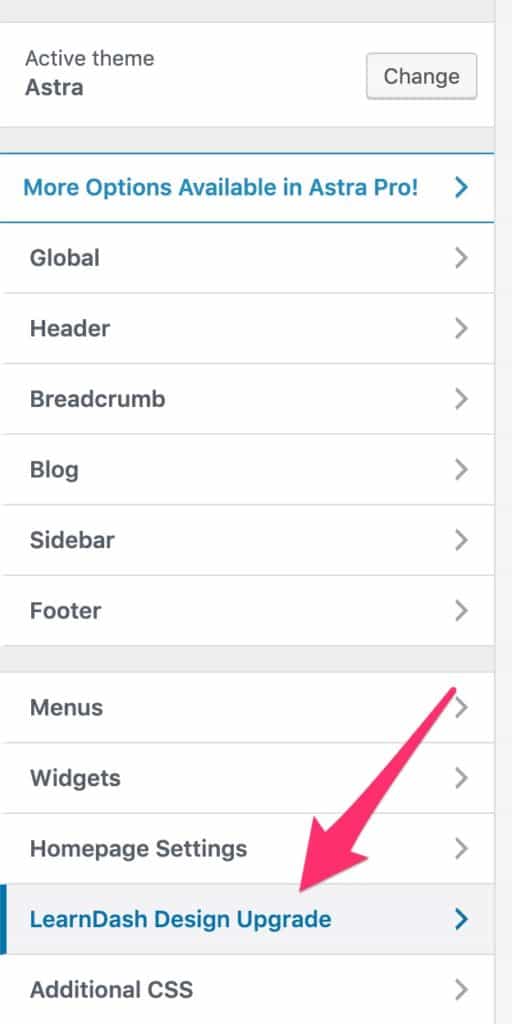
- Click on the LearnDash Design Upgrade panel
- All of our options are listed here, in sub-panels
3. Use “Customize” in the Toolbar
This is often the most preferred method of accessing our plugin’s options, mainly because it will open the WordPress Customizer for you, and you’ll already be previewing a LearnDash-specific page. This means you’ll be able to preview your changes right away.
- Navigate to a page on your site that has some LearnDash elements. For example, this could be:
- a course page
- a lesson, topic or quiz page
- the page that contains your LearnDash profile (
[ld_profile])
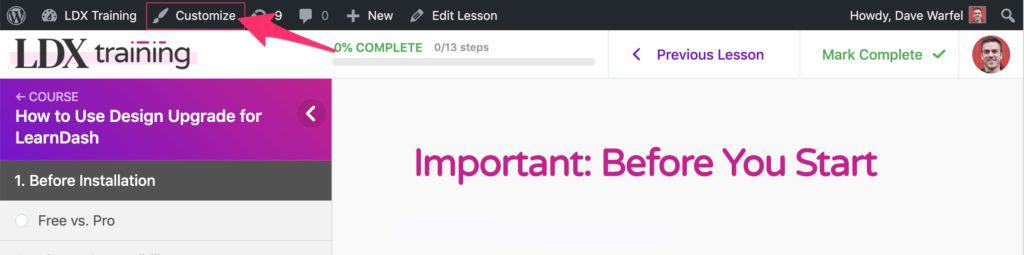
- In the black bar at the top, click Customize
- Navigate to the LearnDash Design Upgrade panel
- Customize your design, previewing it on the right-hand side of the screen, and click Publish when you’re finished
Caveats
- Unfortunately, there is no easy way to preview design changes to the LearnDash login/registration modal. You need to be logged out to see the modal, but logged in to use the Customizer.